Every experienced European exhibition designer keeps a private mental catalogue of stand lighting disasters: the EUR 280,000 custom build at Salone del Mobile whose hero brand wall photographed at CRI 75 looked grey-green in trade press coverage; the 180 sqm island at Hannover Messe where ceiling spots aimed at empty floor for three days because no one had checked aiming during build; the Maison&Objet hospitality lounge where pendant fixtures cast harsh down-light on visitors’ faces, ending dozens of conversations early.
These are not minor failures. Lighting is the most visible single element of a stand and the element most directly responsible for visitor first impressions. Get it wrong and the rest of the stand’s investment underperforms. Get it right and the same physical structure delivers visibly stronger results.
This guide catalogues the recurring exhibition stand lighting mistakes observed across European fairs in 2024-2025 and provides specific fixes that work in build-day reality, not just in lighting designer theory. The mistakes are organised in the order they typically arise, from specification mistakes that lock in failure, through design-stage mistakes that limit recovery options, through build-day mistakes that can still be caught and corrected on site.
Specification-stage mistakes: the failures locked in before any fixture is rented
The most expensive lighting mistakes happen in the brief, weeks before any fixture is ordered. Six recurring specification errors propagate through the entire project lifecycle.
Mistake 1: Specifying fixture count instead of lux levels
Builder quotes routinely list fixture counts (“eighteen LED track spots, six floods”) because that is how builders inventory their kit. Exhibitors who accept this specification language inherit fixture-count thinking and never get to actual lighting outcomes. The result is stands where the fixture count is impressive on paper but the lux levels at the surfaces that matter are inadequate.
The fix is to specify in the brief that every quote must include target lux levels for each functional zone of the stand: hero graphic surface, secondary graphics, product zones, reception, meeting tables, hospitality lounge, and general circulation. Builders responding with fixture counts only should be asked to convert their proposal into lux specifications before the quote is considered complete.
Mistake 2: Mixing colour temperatures across the stand
LED fixtures come in colour temperatures ranging from 2700K (warm tungsten-like) through 6500K (cool daylight-like). Stands that mix 3000K warm-white in hospitality zones with 4000K cool-white in product zones produce visible colour-temperature transitions that read as visual noise rather than intentional zoning.
The fix is to specify a single colour temperature across all stand fixtures in the brief. Defensible choices: 3000K for hospitality-led stands at design fairs, 3500K for mixed-use stands at general fairs, 4000K for product-led stands at technology fairs. Mixing is acceptable only in carefully designed transitions with at least two metres of physical separation between colour-temperature zones.
Mistake 3: Accepting CRI below 90
Basic LED fixtures at CRI 70-80 cost ten to twenty-five percent less than CRI 90+ equivalents. Builders quoting tight prices often default to the cheaper specification unless explicitly told otherwise. The brand-colour consequences only become visible on the stand, when nothing can be changed.
The fix is to specify “CRI 90 or higher on all fixtures” in the brief as a non-negotiable. Builders who push back on this specification are usually trying to preserve margin rather than offering genuine technical alternatives. The total CRI 90+ premium on a 75 sqm stand runs EUR 400-1,200, trivial against the brand-impact downside of getting it wrong.
“Every year we audit stands at Light + Building and Salone del Mobile for CRI compliance against brief specifications. Roughly fifteen percent of stands that specified CRI 90 in the brief actually ended up with CRI 70-80 fixtures because no one verified the delivered specification against the contracted specification. This is the single most preventable lighting failure mode.”, Common framing within FAMAB lighting working-group audits, 2024-2025
Mistake 4: Ignoring electrical capacity limits
European venues include a base electrical allocation in space rental (typically 80-150 watts per square metre). Lighting plans for image-led stands frequently exceed this allocation when combined with AV and digital equipment. Exhibitors discover this when the venue electrician arrives on build day, runs a load calculation, and informs the team that an additional EUR 800-1,800 of surcharge applies.
The fix is to request the lighting plan’s total electrical load (in kilowatts) from the builder during the quote phase, compare it against the venue’s included allocation for the contracted stand size, and either reduce the lighting load or budget the surcharge explicitly. The /booth-design/lighting-design reference covers electrical-load planning in detail.
Mistake 5: No DMX scenes for time-of-day variation
Stands lit identically from 09:00 (sparse hall traffic, bright ambient hall lighting) through 17:00 (peak fair, dimmed ambient) under-perform during one of those periods. Morning lighting that reads well against bright hall lighting reads too bright at afternoon peak; afternoon-optimised lighting reads weakly in the morning.
The fix is two or three DMX-programmed lighting scenes with simple dim transitions across the day. Programming cost: EUR 400-1,200. Returns: meaningfully better visitor first-impression consistency across the fair.
Mistake 6: No on-site adjustment capability during build day
Lighting plans designed before the stand is built and locked at the specification stage cannot account for the inevitable surprises of build day: reflective surfaces in the wrong place, neighbour-stand lighting spillover, fabric panel positions slightly different from drawings. Stands without on-site adjustment capability live with these surprises through the whole fair.
The fix is contracting on-site programming and adjustment support for at least build day plus the first fair day. Cost: EUR 380-680 per day. The marginal cost is small; the option value is large.
Design-stage mistakes: the failures that limit recovery options
Once the lighting plan moves from specification into design, four recurring errors narrow the recovery options before any fixture is installed.
Mistake 7: Flat overall lighting with no focal concentration
Stands lit evenly across all surfaces, uniform fifty lux above hall ambient on every wall, produce visually flat results where no element draws the eye. The visitor approaching from across the hall has no anchor point to attach the brand statement to.
The fix is to concentrate twenty-five to forty percent of all accent fixtures on a single focal zone: the hero brand wall, the corner element on a corner stand, or the product display that anchors the brand narrative. The focal-zone lux target should be roughly fifty percent higher than the secondary zones. Visitors approaching the stand should see the focal zone first, register the brand statement, and then explore secondary surfaces.
Mistake 8: Lighting that flatters fabric but kills product
Fabric SEG graphics look best under diffuse wash lighting at moderate lux levels. Real products often look best under concentrated accent lighting at higher lux levels with specific angle treatments. Stands that apply one lighting strategy across both element types end up with one or the other looking poor.
The fix is zone-specific lighting strategy with different fixture types for each zone. Track floods at 600-700 lux wash fabric SEG surfaces; track spots at 800-1,100 lux with specific aiming highlight products. The /booth-design/graphics-and-large-format-print guide covers the fabric-print specification side of this question.
Mistake 9: Pendant fixtures positioned for harsh down-light on faces
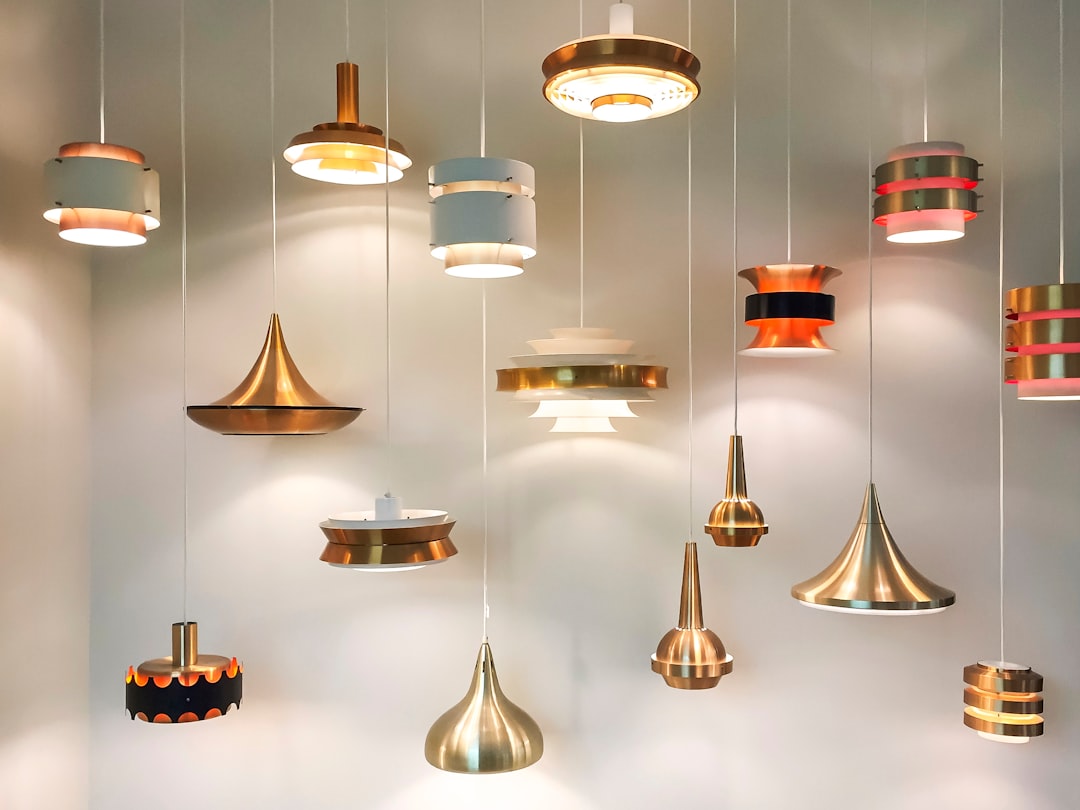
Hospitality zones with conversation furniture are routinely fitted with pendant fixtures positioned above seating. When fixtures hang directly above visitor seating positions, the down-light creates harsh shadows on faces, makes eye contact uncomfortable, and ends conversations early.
The fix is to position pendant fixtures over tables rather than over seating positions, use diffuse rather than directional pendant types, and supplement with indirect wall-mounted or floor-mounted ambient lighting that fills the conversation zone with even illumination. The /booth-design/meeting-rooms-and-hospitality-zones guide covers this in more depth.
Mistake 10: No accent lighting on the brand logo or main statement
Surprisingly common: stands where the brand wall has even wash lighting but the logo or primary statement has no specific accent. Visitors register the wall but not the brand. This usually happens when the lighting plan was designed around the wall as a surface rather than around the logo as an element.
The fix is to add one or two dedicated track spots aimed specifically at the logo or primary statement, at lux levels 200-400 lux above the surrounding wall wash. Make the logo the visually highest-illumination point on the stand.
“Every stand we audit at major European fairs gets a ‘logo lux’ score, the lux level on the company’s logo specifically. Stands that score below the surrounding wall lux level are stands that have invested in everything around the brand instead of in the brand itself. This is the most common lighting design oversight in the European market.”, Common framing among IFES lighting working-group reviewers, 2025
Build-day mistakes: the failures that can still be caught and corrected
Build-day lighting work happens fast, often under time pressure, and frequently with crew who weren’t involved in design decisions. Five recurring build-day errors are catchable with disciplined site supervision.
Mistake 11: Fixtures aimed at floor instead of brand surfaces
The most common build-day error in the European market. Track spots get installed and aimed mechanically at the floor of the stand rather than at the brand surfaces, product zones, or focal elements they were specified to highlight. Visitors arrive on day one to find a brightly lit floor and dimly lit walls.
The fix is to walk through the lit stand with the install crew on the morning of opening day, with the lighting designer or builder PM present, and confirm every fixture aims at its specified target. This takes thirty to ninety minutes and prevents the most embarrassing on-site lighting failure mode.
Mistake 12: LED strip lighting in the wrong colour temperature
Builders’ stock LED strip inventory often includes multiple colour temperatures. Install crews working at speed sometimes mount strip from the wrong inventory bin, producing architectural lines that visibly differ in colour temperature from the rest of the stand.
The fix is to inspect every LED strip section on the morning of opening day. If colour-temperature inconsistencies are found, the strip can usually be swapped in twenty to forty minutes, manageable if caught before opening, unmanageable once the fair has started.
Mistake 13: Backlit fabric panels with visible hot spots
Backlit fabric panels rely on LED arrays behind the fabric distributing light evenly across the fabric surface. When LED placement is inconsistent or fabric tension varies, visible hot spots appear that ruin the smooth glow effect.
The fix is to test every backlit panel before it is integrated into the stand structure, ideally during the warehouse pre-build rather than at the venue. Hot spots discovered at the venue can sometimes be corrected by adjusting fabric tension or adding diffuser layers, but the correction options are limited compared to warehouse-stage detection.
Mistake 14: DMX programming not loaded onto the on-site controller
Lighting designers program DMX scenes on their own equipment during the design phase. On build day, the programmed file has to load onto the on-site DMX controller. When the file format, controller firmware, or addressing scheme don’t match, the programmed scenes don’t play and the lighting reverts to a default state.
The fix is to test the DMX programming load onto the actual on-site controller during build day, not at first fair-day morning. Discovery on build day allows time for re-programming or controller swap; discovery on fair-day morning means the fair runs with default lighting.
Mistake 15: Failure to verify lux levels before opening
Lux levels can be measured with a EUR 80 handheld lux meter in two to three minutes. Yet stands routinely open without anyone verifying that the achieved lux levels match the specified targets. When achieved levels are below specification, no one knows until visitor feedback or trade-press photography surfaces the failure.
The fix is to walk the lit stand with a lux meter on the morning of opening day, measuring each functional zone against its specified target, and adjusting fixture aiming or dimmer levels as needed. This takes twenty to forty minutes for a 75 sqm stand and prevents the most expensive lighting failure modes.
| Mistake | When it happens | Cost to fix at that stage | Cost if caught earlier |
|---|---|---|---|
| Wrong CRI specification | Specification | Cannot fix on site | EUR 400-1,200 to upgrade |
| Mixed colour temperatures | Specification | Cannot fix on site | EUR 0 (specify single CT) |
| Electrical capacity exceeded | Specification | EUR 800-1,800 venue surcharge | EUR 0 (verify in design) |
| No DMX scenes | Design | EUR 1,200-2,800 emergency programming | EUR 400-1,200 at design |
| Flat overall lighting | Design | Limited (fixture aiming only) | EUR 0 (specify focal zones) |
| Fixtures aimed at floor | Build day | 30-90 minutes walk-through | EUR 0 (catch on build day) |
| Wrong LED strip colour | Build day | 20-40 minutes per section | EUR 0 (inspect on build day) |
| Backlit hot spots | Build day | Limited fixes at venue | Test at warehouse pre-build |
| DMX programming fails | Build day | Re-program or revert to default | Test load on build day |
| Lux not verified | Opening | Visitor feedback only | EUR 0 (lux meter walkthrough) |
Recovery options when something has already gone wrong
Even with perfect specification and design, build days produce surprises. The fixes below address common emergency situations.
If the hero brand wall reads too dimly on day one, the recovery is to add two to four supplementary track spots from the venue’s equipment rental desk. Cost: EUR 80-180 per fixture plus rapid install labour. Lead time: typically two to four hours via venue technical services.
If colour-temperature inconsistency is visible, the recovery is to filter the warmer fixtures with colour-correction gels available from venue technical services or rapid-delivery suppliers. Cost: EUR 12-25 per filter. Time: thirty to sixty minutes to apply across affected fixtures.
If DMX programming has failed and the controller defaults to flat lighting, the recovery is to call in an external lighting programmer from one of the venue’s approved supplier networks. Most major European venues have at least three programmers on emergency call. Cost: EUR 480-880 for emergency call-out plus programming time.
If the venue electrical surcharge is larger than budgeted, the recovery is to shed non-essential lighting load, usually decorative pendant fixtures or LED strip sections, to bring total load under the included allocation. Time: one to two hours of crew work; cost: zero.
“Build day surprises happen on every project. The difference between projects that recover gracefully and projects that struggle is whether the team has a named lighting supervisor on site who can make recovery decisions quickly without escalating every problem to the exhibitor’s marketing team.”, Common framing within UFI corporate-member exhibitor operations guidance, 2025
Building lighting discipline into the next fair
The exhibitors who avoid these mistakes consistently across multi-fair calendars build lighting discipline into their planning process. Three practices recur across the most disciplined European exhibition teams.
First, lighting specification language standardises across fairs. The same brief language (lux levels, CRI, colour temperature, fixture types, DMX expectations) gets used for every fair quote, which eliminates specification drift between projects.
Second, lighting walkthroughs become a fixed item on the build-day checklist. Five minutes per zone, lux meter in hand, with the builder PM and lighting designer present.
Third, post-fair lighting reviews capture what worked and what didn’t. The next fair benefits from documented lessons rather than each project starting fresh.
The cost of building this discipline is modest, fewer than ten hours of process work across a year. The return is consistently better-lit stands across every fair, with measurable lift in visitor first-impression quality and trade-press photography results.
Use /rfq to circulate a lighting-specified brief to vetted European builders. The /booth-design/lighting-design reference covers technical specifications in depth. The /calculator includes lighting allocation modelling within total stand budgets. Browse /builders to filter for builders with lighting-design specialist staff.
References
- IES (Illuminating Engineering Society), “Recommended Practice for Museum and Exhibition Lighting,” IES RP-30
- CIE (International Commission on Illumination), “Technical Report CIE 224:2017 Colour Fidelity Index”
- FAMAB Communication Association, “Lighting Quality Audits at European Trade Fairs,” 2024-2025 reports
- AUMA (Association of the German Trade Fair Industry) exhibitor lighting guidance, 2025
- Messe Frankfurt Technical Office, “Stand Lighting and Electrical Technical Standards,” 2026 edition
- IFES (International Federation of Exhibition and Event Services), “Lighting Audit Methodology for European Trade Fair Stands,” 2025
- UFI (Global Association of the Exhibition Industry) Global Exhibition Barometer, 2024 edition
- Light + Building 2024 stand-design retrospective, lighting failure case studies
FAQFrequently asked questions
Fixtures aimed at floor instead of brand surfaces is the most common build-day error in the European market. Track spots get installed and aimed mechanically at the stand floor rather than at the brand walls, product zones, or focal elements they were specified to highlight.
The fix is a thirty-to-ninety-minute walkthrough of the lit stand on opening-day morning with the install crew and lighting designer, confirming every fixture aims at its specified target. This single discipline prevents the most embarrassing on-site lighting failure mode and costs zero EUR to implement.
Walk the lit stand on opening-day morning with a EUR 80 handheld lux meter, measuring each functional zone against its specified target lux levels. Hero graphic surfaces should hit 800-1,200 lux, secondary graphics 500-700 lux, product zones 600-900 lux, reception 400-600 lux, meeting tables 350-500 lux, and general circulation 300-450 lux.
Adjust fixture aiming or dimmer levels where readings fall outside the specified bands. This walkthrough takes twenty to forty minutes for a 75 sqm stand and prevents the most expensive lighting failure modes from going undetected through the fair.
Almost always a CRI (Colour Rendering Index) problem. Basic LED fixtures at CRI 70-80 cost 10-25% less than CRI 90+ equivalents, and builders quoting tight prices often default to the cheaper specification unless explicitly told otherwise. CRI 70-80 renders bright primary colours acceptably but flattens subtle tones and shifts brand colours visibly: corporate teals can read as muddy green, brand reds can read pink.
The fix is specifying ‘CRI 90 or higher on all fixtures’ as a non-negotiable in the brief, then verifying the delivered fixtures match the contracted specification. The CRI 90+ premium on a 75 sqm stand is EUR 400-1,200, trivial against brand-impact downside.
Four common emergency situations have known fixes. If the hero brand wall reads too dimly, add two to four supplementary track spots from venue rental at EUR 80-180 per fixture, available within two to four hours via venue technical services. If colour-temperature inconsistency is visible, apply colour-correction gels at EUR 12-25 per filter, takes thirty to sixty minutes.
If DMX programming has failed, call an emergency lighting programmer from the venue’s approved supplier network at EUR 480-880 for call-out plus programming time. If electrical surcharge is over budget, shed non-essential decorative or LED strip load to bring consumption under the included allocation, takes one to two hours.
Over tables. Pendant fixtures positioned directly above visitor seating positions cast harsh down-light on faces, creating uncomfortable shadows, making eye contact difficult, and ending conversations early. Pendants over tables illuminate documents and refreshments without harsh facial down-lighting.
The defensible hospitality lighting strategy combines pendant fixtures over tables with diffuse indirect ambient lighting from wall or floor mountings that fills the conversation zone with even illumination at 250-350 lux. Pendant types should be diffuse rather than directional for this application.
CRI specification drift. FAMAB working-group audits at Light + Building and Salone del Mobile in 2024-2025 found roughly fifteen percent of stands that specified CRI 90 in the brief actually ended up with CRI 70-80 fixtures because no one verified the delivered specification against the contracted specification.
The prevention is twofold: write ‘CRI 90 or higher on all fixtures’ explicitly in the brief, and verify with the builder during build day by checking fixture labelling. Builders sometimes substitute cheaper fixtures expecting that no one will check. The CRI 90+ premium is small relative to brand-impact downside, but only if the contracted specification is what actually gets installed.